
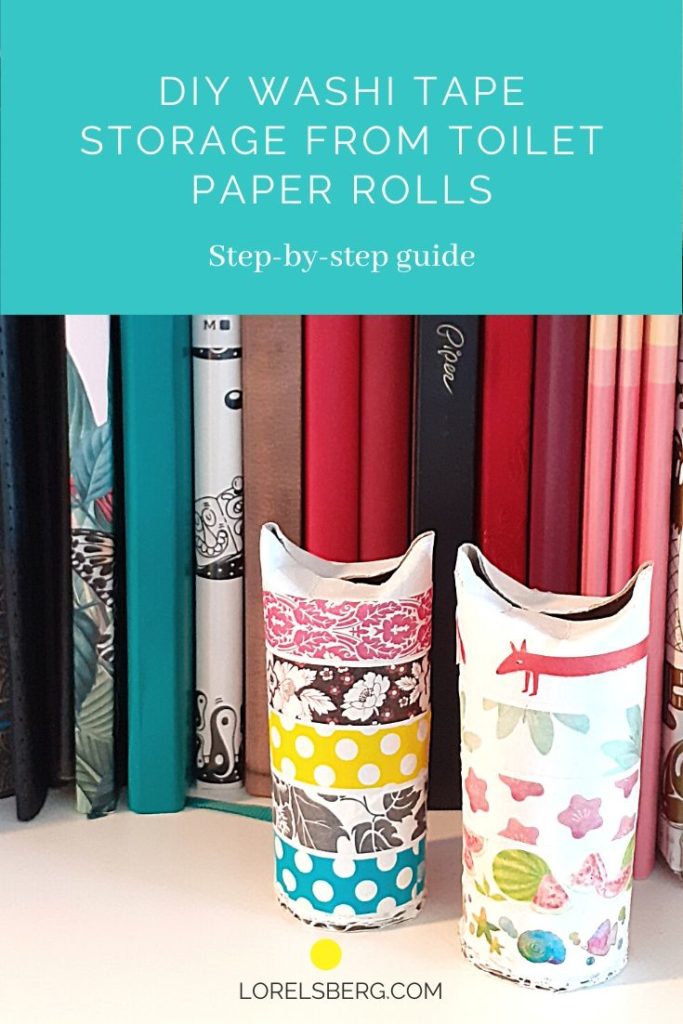
Learn how to make your own DIY Washi tape storage using toilet paper and other things you likely have around the house.
If you’re into arts and crafts, then you’re probably very familiar with the beauty of Washi tapes. When I first started my bullet journal a was gifted a huge bag of different decorative tapes for my birthday. They are gorgeous, and I love all of them.
The problem was how to store them all for easy access without it being a huge mess. My solution at the time was to just throw all the Washi tape rolls into a bunch of Ziploc bags, and then throw those in a drawer. It works, but it’s not the nicest.
For a prettier solution, I recently created some Washi tape holders from toilet paper rolls. It’s a super easy and fun crafty activity, and I was really pleased by the outcome. Here is how you can make your own.
What you need
- Toilet paper rolls – Careful, not all tape rolls are the same size, so make sure your tapes fit into a TP roll before you get started. This will also tell you how many rolls you need to store all your tapes.
- Washi tape – for decorating and then storing.
- White paint and paintbrushes
- Glue
- Extra cardboard
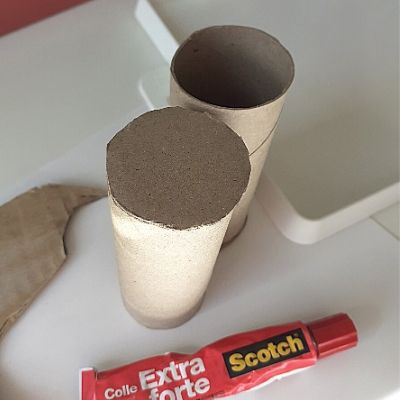
Step 1: Create a bottom for your rolls
Put your toilet paper rolls on the extra piece of cardboard and trace their outline. I used parts of an old package box, but something thinner might have looked better in the end I think.
Cut out the circles and glue them on to one end of the toilet paper rolls (see image above).
Let the glue dry.
Step 2: Paint your rolls
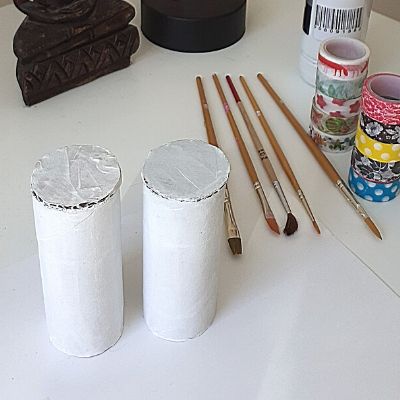
Once the glue is dry, paint your rolls with the white paint. I just added one thin layer as a primer. We will decorate the rolls later with the Washi tape, so painting them white ensures that your tape is nice and visible on the roll.
Of course, you can choose any base colour you would like.
Let the paint dry thoroughly.
Step 3: Decorate your DIY Washi Tape Storage
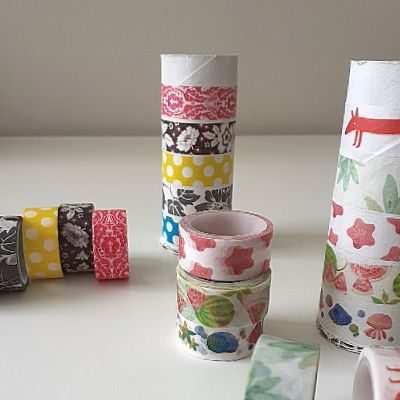
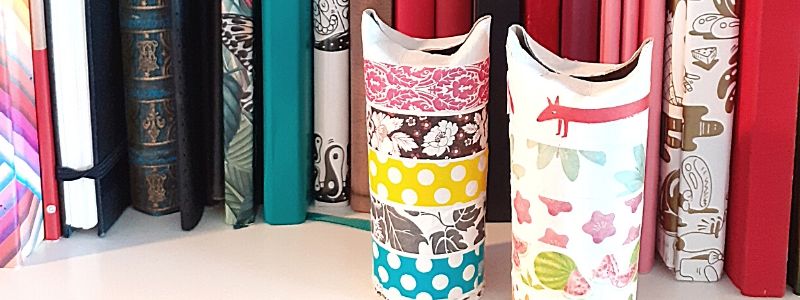
The whole point of these Washi tape storage rolls is that you won’t need to dig through all your tapes in order to find the one you’re looking for. For that reason we will decorate each roll with the tapes that we will then store on the inside of said roll.
So get out all your tapes and figure out which ones you want to store together and in which order. I simply went by what would look good together on the outside, but you can sort them by colour or pattern or whatever works for you.
Once you’ve decided which tapes to store in each roll, put a strip of each of those tapes all around the outside of the roll.
Make sure you apply the tape nice a parallel to each other so you end up with clear lines.
Step 4: Store your Washi Tape
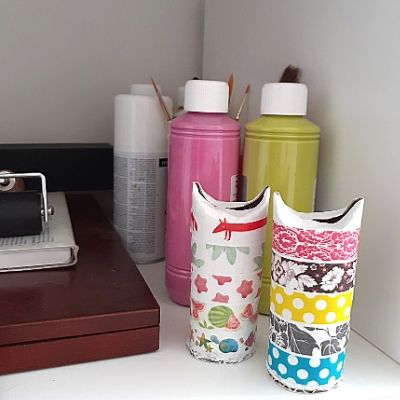
Add your tapes to each roll and close the tops by gently bending down the end of the toilet paper roll on two sides. This will ensure the tapes stay inside if the roll falls over, and it’s super easy to open and close to access your tapes.
That’s it. Now you can create as many DIY Washi tape storage rolls as you need for your entire stash. Have fun!
Pin it for later
Looking for more artsy goodness?