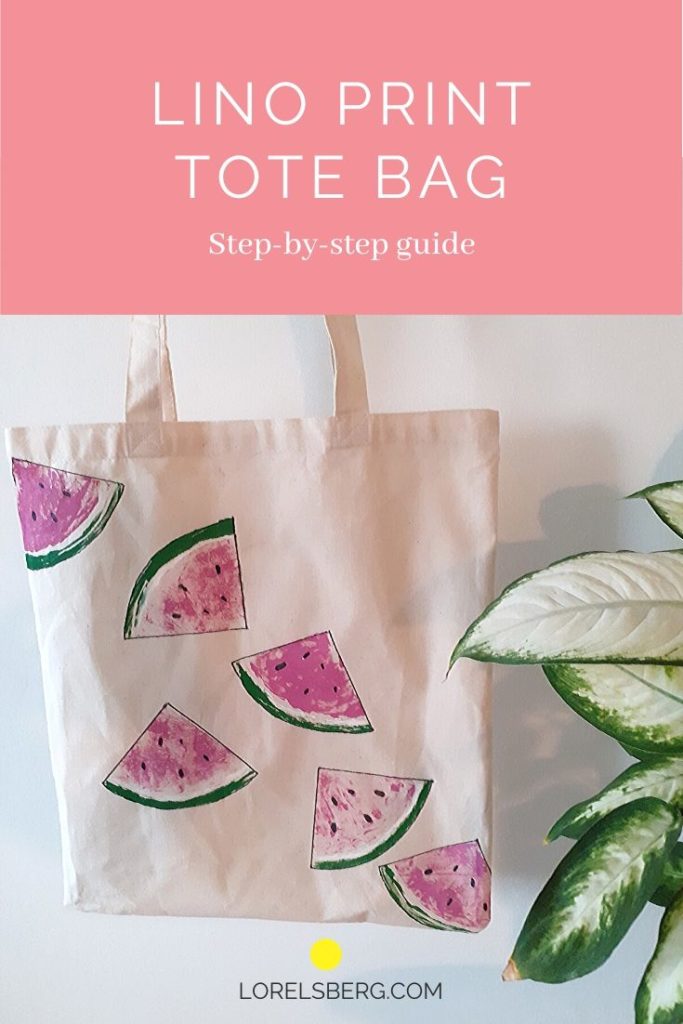
Want to jazz up that plain tote bag of yours? Or maybe an old t-shirt? Here’s a step by step guide on how to decorate fabrics with linocut print.
What you need
- Fabric paints
- Linoleum
- Linocut carving tools
- Paintbrushes and Lino Roller
- Sharpie (for outlines if you want)
- A tote bag or t-shirt
Step 1: Create the linocut
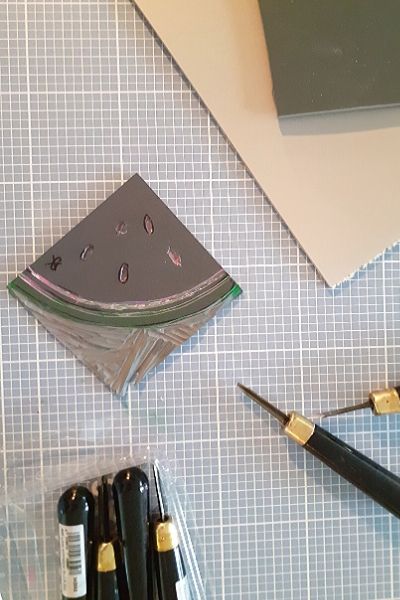
Figure our which image you would like to print on your fabric. It should be a flat image with not too many details and colours. I would recommend a maximum of 2, maybe 3, colours. Not counting any black outline you can add with a Sharpie at the end.
If you have sketched or printed your image beforehand, you can transfer it to the linoleum using carbon paper. Or, if you feel confident, you can draw directly on the linoleum.
Keep in mind that what you will print in the end will be a mirror image of what you are drawing. This is especially important if you include any writing in your design.
Once you are happy with with design start carving out the negative spaces, i.e. the spaces that won’t have any colours.
You want to make sure that you have a bit of negative space around your design so you have something to hold on to when you pull the lino off the fabric.
Step 2: Start printing on your tote bag
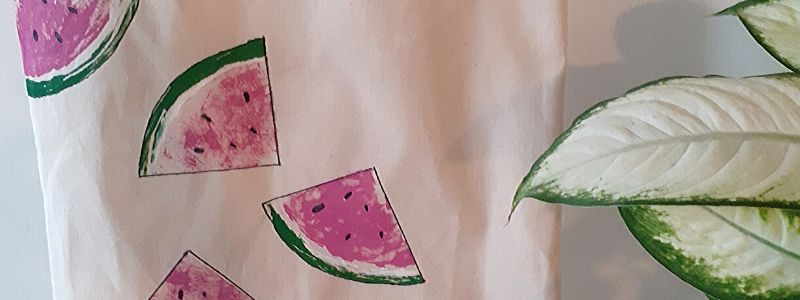
You can either map out your pattern before you start printing, or you can just go with the flow. Whatever feels right for you. I just started and saw where it took me, and I ended up with my watermelons arranged in a diagonal pattern which I think works quite well.
I would definitely recommend making some test prints on a separate fabric or paper to make sure you are happy with your cut and to figure out how much colour you want to apply, as your print colours will be more or less solid depending on how much colour you put on the linoleum.
Also put a piece of cardboard between the two sides of your bag or shirt, so the fabric colour doesn’t accidentally print through the other side.
Apply the colours to your linoleum, using the roller for bigger areas and paintbrushes for smaller details. I used the roller on the pink and a paintbrush for the green.
Step 3: Touch ups and outlines
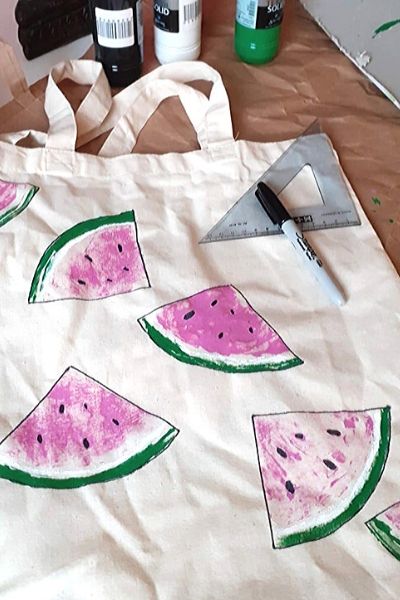
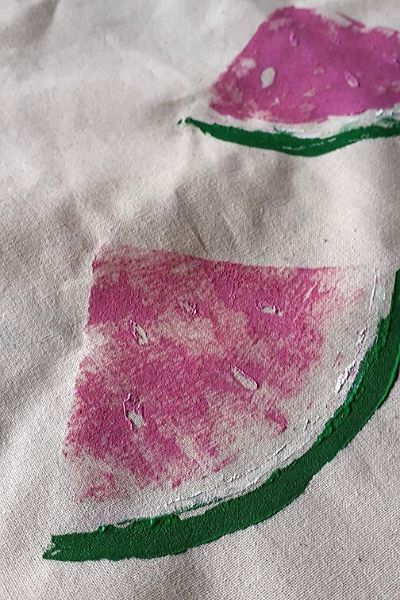
Feel free to touch up any details you are unhappy with with a paintbrush. There were some spots that didn’t have enough colour in my opinion, so I filled in some gaps.
Let it all dry for about half an hour or so, or until the paint is dry to the touch and won’t smudge.
You can now use a Sharpie or special fabric pens if you have them to add outlines and any other details that you would like to add.
I purposely left the pits blank so I could add them with pen later. I don’t think they would have worked out so great if I had applied black paint to the print.
Step 4: Ironing
Leave your bag to dry some more. You want to make sure that the paint is dry all the way through. Turn your bag inside out and iron the newly decorated side from the inside to fix the paint.
Check your paint’s instructions for details on ironing and washing.
Et voilà, your new and improved bag is ready. You can keep the linocut for later use if you want to print a similar pattern on something else.
Looking for some more creative ideas?